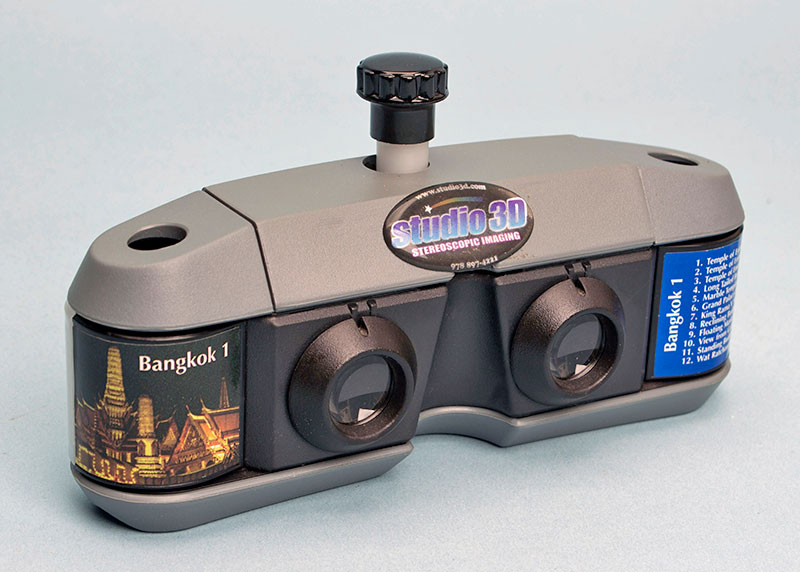
3DISCOVER VIEWER
Also known as the DISCOVER 3D Viewer, this relatively unknown stereo collectible was introduced in Canada in 1996 and featured the excellent stereo photography of Jacques Cote and Michel Hamel. The viewer provided some of the best quality stereo imaging ever seen, due to the full 35mm film and adjustable interocular lenses. Unfortunatley, (possibly due to lackluster marketing and/or issues with the motor transport) sales were poor and Wrebbit ceased production in 2003 with about 100 titles.
The official website is still maintained by Jacques here.
HOW TO REPAIR 3DISCOVER VIEWER
LITERATURE
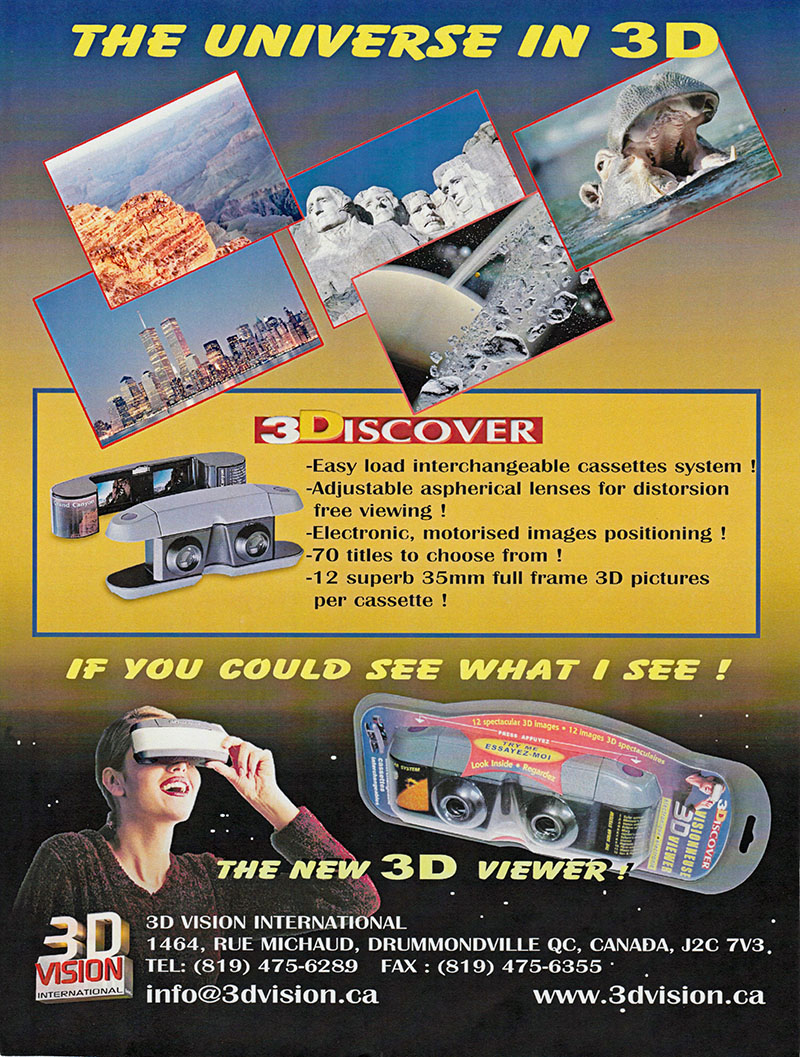
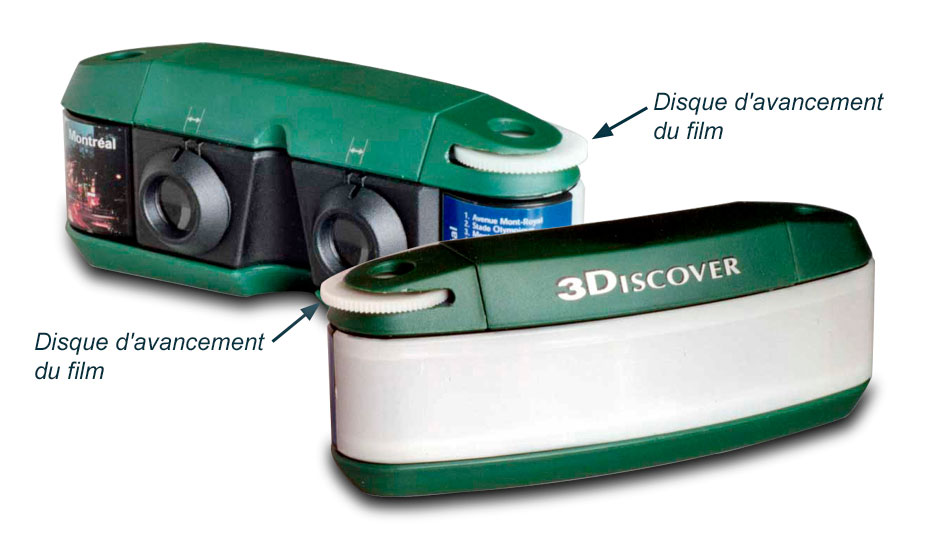
VIEWER with CASSETTES
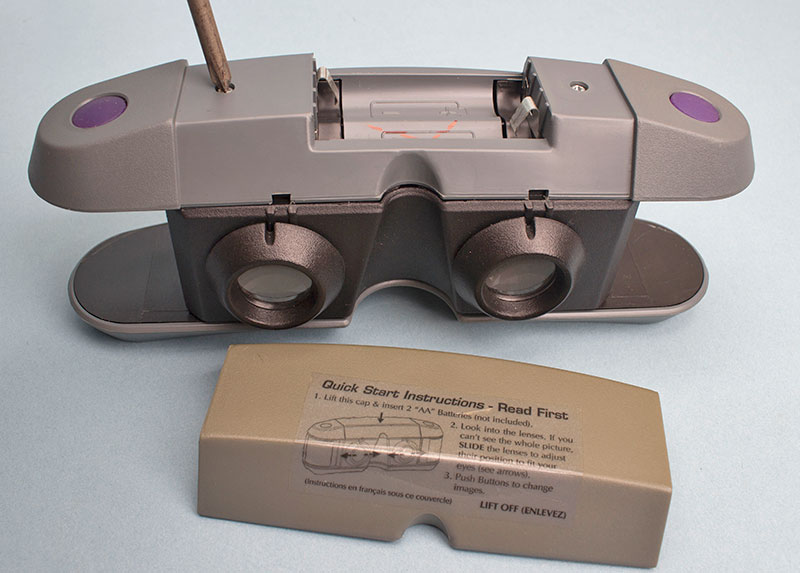
Two AA batteries are required to drive the motor which move the film strip. A special sensor stops the film at the appropriate spot. Cassettes generally hold 12 24x36mm pairs of images.
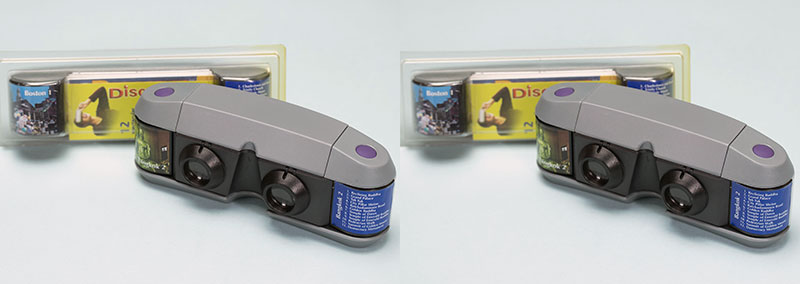
RETAIL PACKAGING
Hanging blister packs for retail sales ($US 30-40)
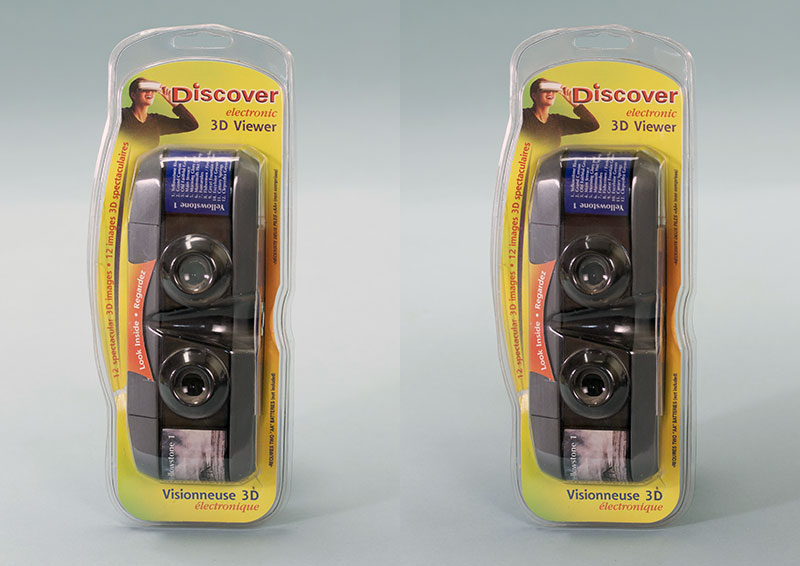
SPECIAL PACKAGING
This was the original package design but was found to be too expensive and difficult to assamble, ship and display. Instead it was used for custom and corporate titles such as Cirque du Soliel shown.
REPAIRING VIEWERS
Many people are frustrated that their viewers no longer work- the film does not move.
It turns out the transport design was less than optimal ... also that the film, sitting for a while, develops curl "memory". The current owner of 3Discover, Jacques Côté suggests this tip:
We have noticed that some viewers will stop working, especially after being left unused for a long period of time. Usually, the longer the viewer was left unused, the harder it is to fix it. If this is the case with your viewer, please try this procedure:
First, remove the batteries and check the battery contacts. Are they clean? Did the batteries leak and block the contacts? If they are dirty or rusted, you can use a metal tool to remove dirt and rust from the metal to get some clean battery contacts. Then check their shape. Sometimes, dropping the viewer on the side may crush one of the folded contacts to a point it doesn't touch the battery anymore. If this happens, only one battery contact will touch the battery at any time, and the viewer needs both contacts to work. You can use a flat head screwdriver to pull the contact back to shape and try again.
If the batteries contacts are fine, put brand new, strong batteries in your viewer. Remove the film cassette from the viewer. While pushing and holding one of the 2 mauve advance buttons, use your finger to turn the white sprocket gear that is visible when the cassette is removed. This gear and other internal gears (there are 5) may be jammed by internal pressure or a piece of dust. Move the gear both ways and keep pushing the advance button while doing so. Changing button may help, because un-jamming the gears may be easier in one way than the other.
If this doesn't work, you can also try using a kitchen knife, not a sharp one, to move the gear. Slide the knife along the top of the gear in a back and forth movement, while applying enough pressure on the knife and still pressing one of the mauve button. Change the way you are holding the viewer to modify internal pressure and keep switching from one button to the other. Try to move the knife slowly and fast, varying the pressure you apply on the gear. And be patient. It can sometimes take a few minutes of work to make it function again. And when it does, the viewer will be as good as new. It works 90% of the time if this is the problem.
If the above doesn't work, the only left solution is to unscrew the top of the viewer and check the wiring. A wire may be unsoldered. If you spot one, it is easy to solder it yourself or have someone do it for you.
We have found another option is to supercharge the power by replacing one or both of the normal 1.5V AA batteries with 3.6V (like these.)
CONVERTING VIEWERS TO MANUAL
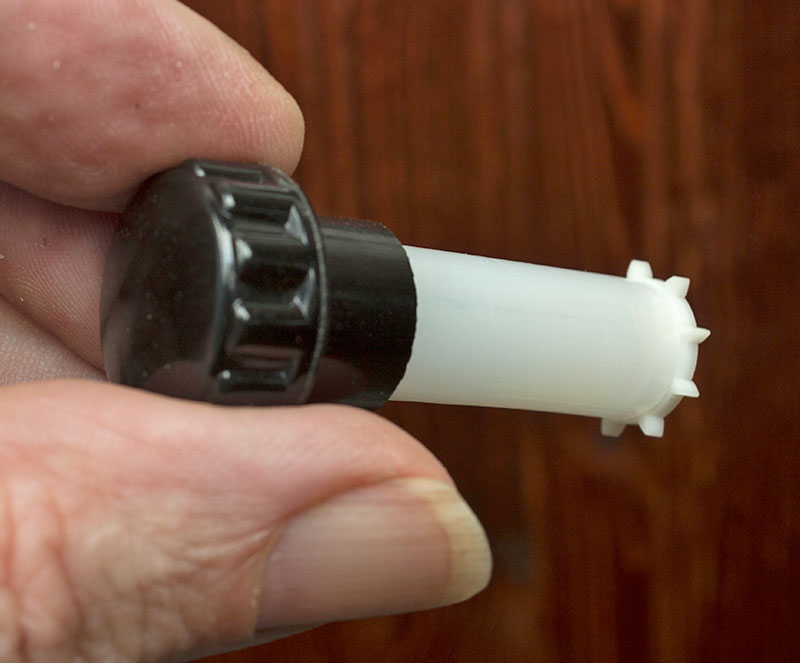
Certainly one option is to convert from motor to manual drive. I've found some parts that were easily available and fit together to make a working viewer with no batteries.

These 3 parts are from Ace Hardware, Hillman parts. The only important size is the inner diameter of the plastic tube: 3/8" exactly fits on the neck of the drive gear.
Remove battery compartment lid and remove two screws underneath.
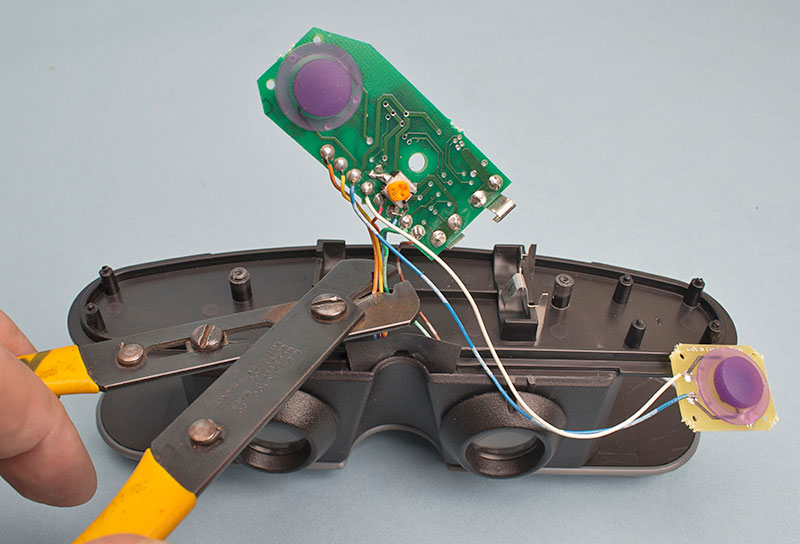
Remove battery compartment and cut wires... hide any leftover wire in body.
CAREFULLY pry off top of viewer... this is the trickiest part as this piece is glued or welded on pretty solid. It will come off with gentle but sturdy work with a flat end screwdriver.
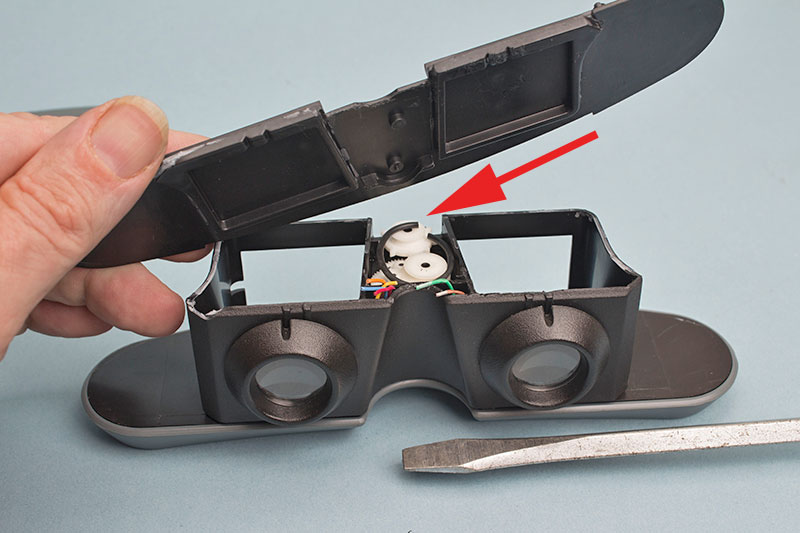
Once the top is off you'll see the gears and a possibly broken rubber belt. The only important piece is the drive gear in the back.
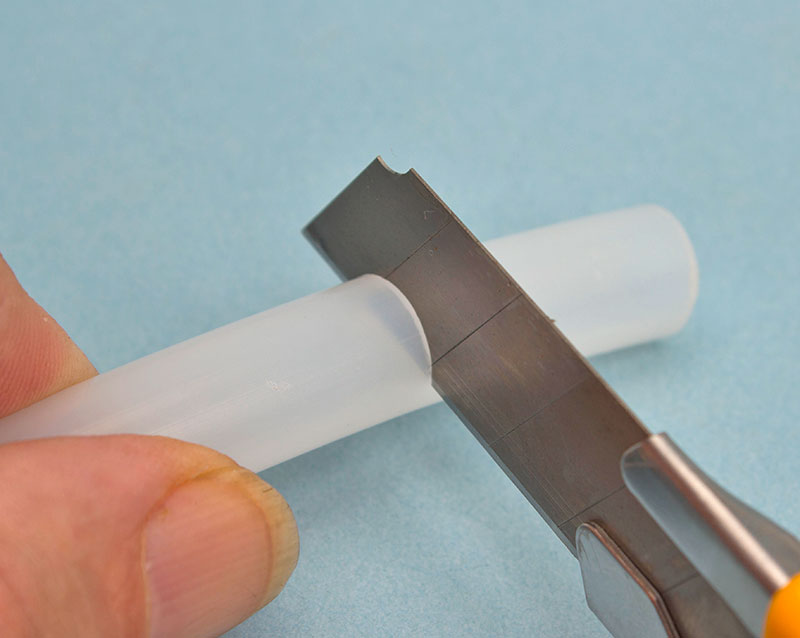
The 3/8" inner diameter plastic tube should be straight if possible... cut a little longer than nylon spacer (ours is 1", so cut tube to 30mm).
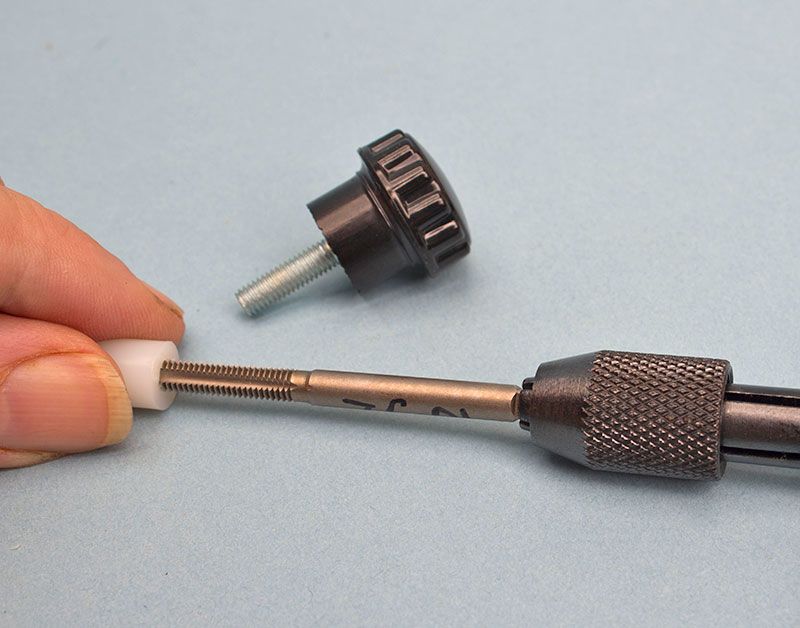
The inside of the nylon spacer should be tapped to accommodate the threads of the knob.
The 3 parts should fit together and the drive gear is attached to the tube. May be necessary to sand the spacer and apply model glue to it and a bit on the gear neck.
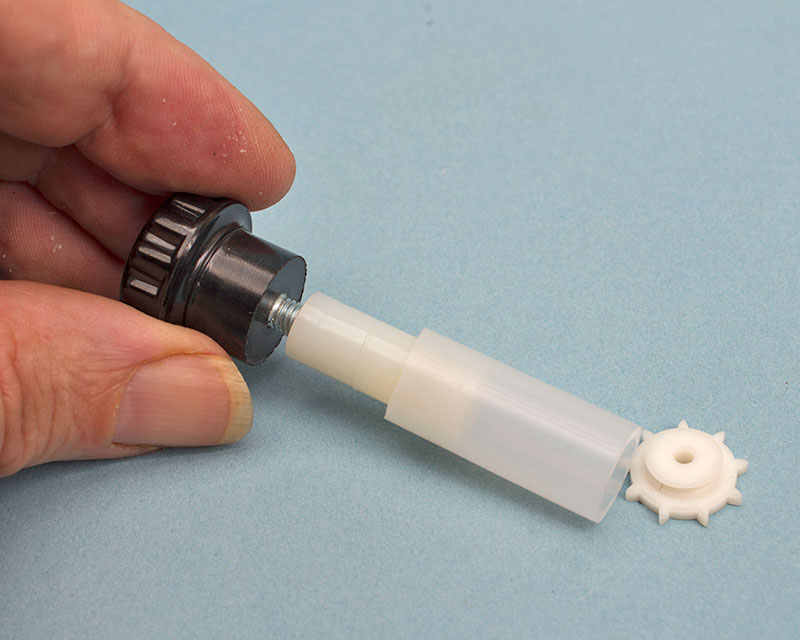
The final piece will look like this. We can make one and ship it to you for $19.95 including U.S. postage. Contact us for information.
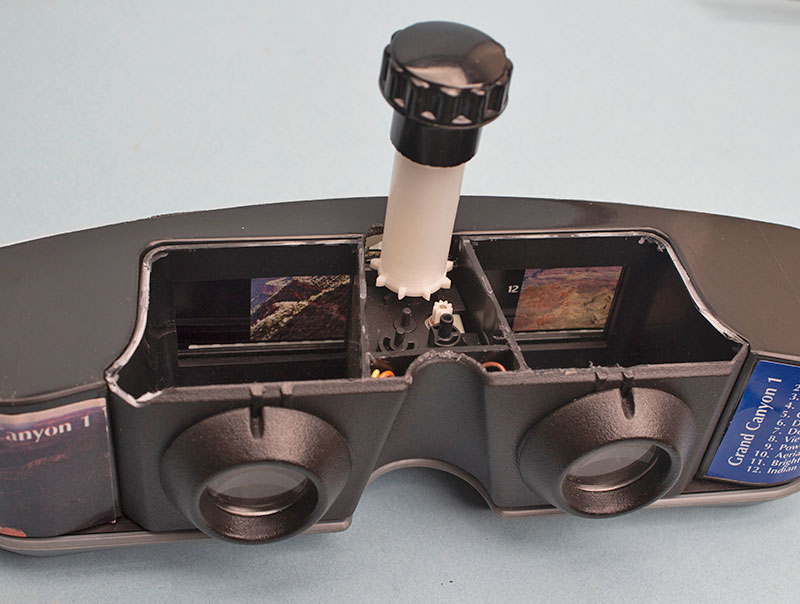
Here's the knob to gear piece in place before re-assembling viewer. The drive shaft can actually be tested at this point.
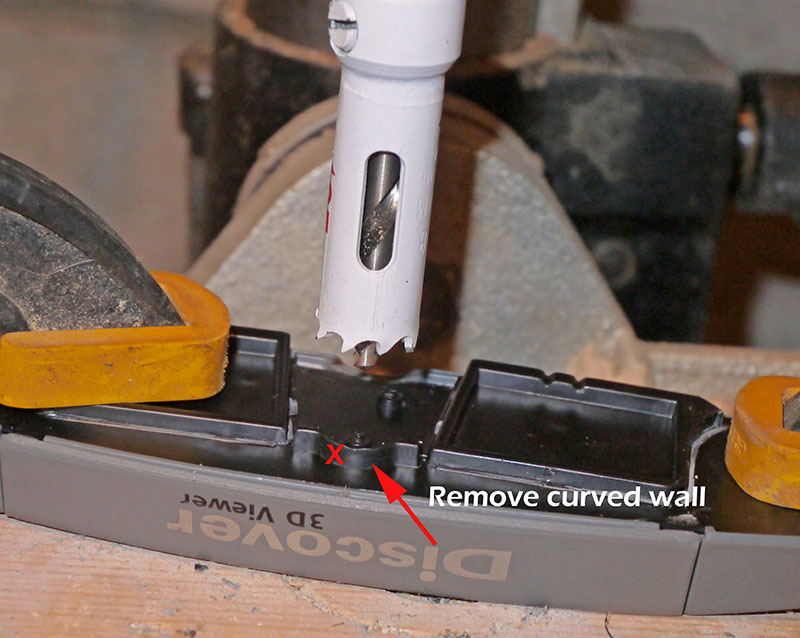
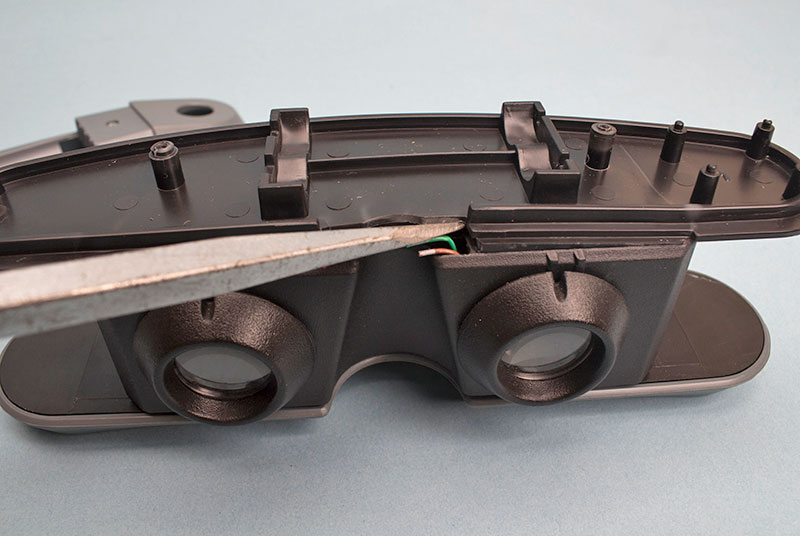
A 5/8" hole needs to be drilled for the new drive shaft . First assemble the 3 top pieces, then drill through all 3 using the spindle as a guide. The little curved lip should be removed in the process. Check to make sure the shaft has room to get in and sit on the spindle... the gear can be tested again before you glue the top back onto the body.
THAT'S IT! The knob/gear part should fit through the holes and sit on the spindle. Put your cassette on snugly and wind away (you'll notice every other shot will be wrong eye views and need to be skipped). David Starkman loves his manual 3Discover!
(NOTE: The gear may still slip if the film is very tight. Make sure the cassette is on tight or re-attach. You may need to move the film with a paper clip end or small screwdriver- once you get past the tight area it should be easier to move... sometimes you'll want to leave overnight to uncurl.
Not a perfect fix but nice to not worry about batteries, motor or drive belt.)
3Discover did some prototyping of manual viewers, but none were ever manufactured.